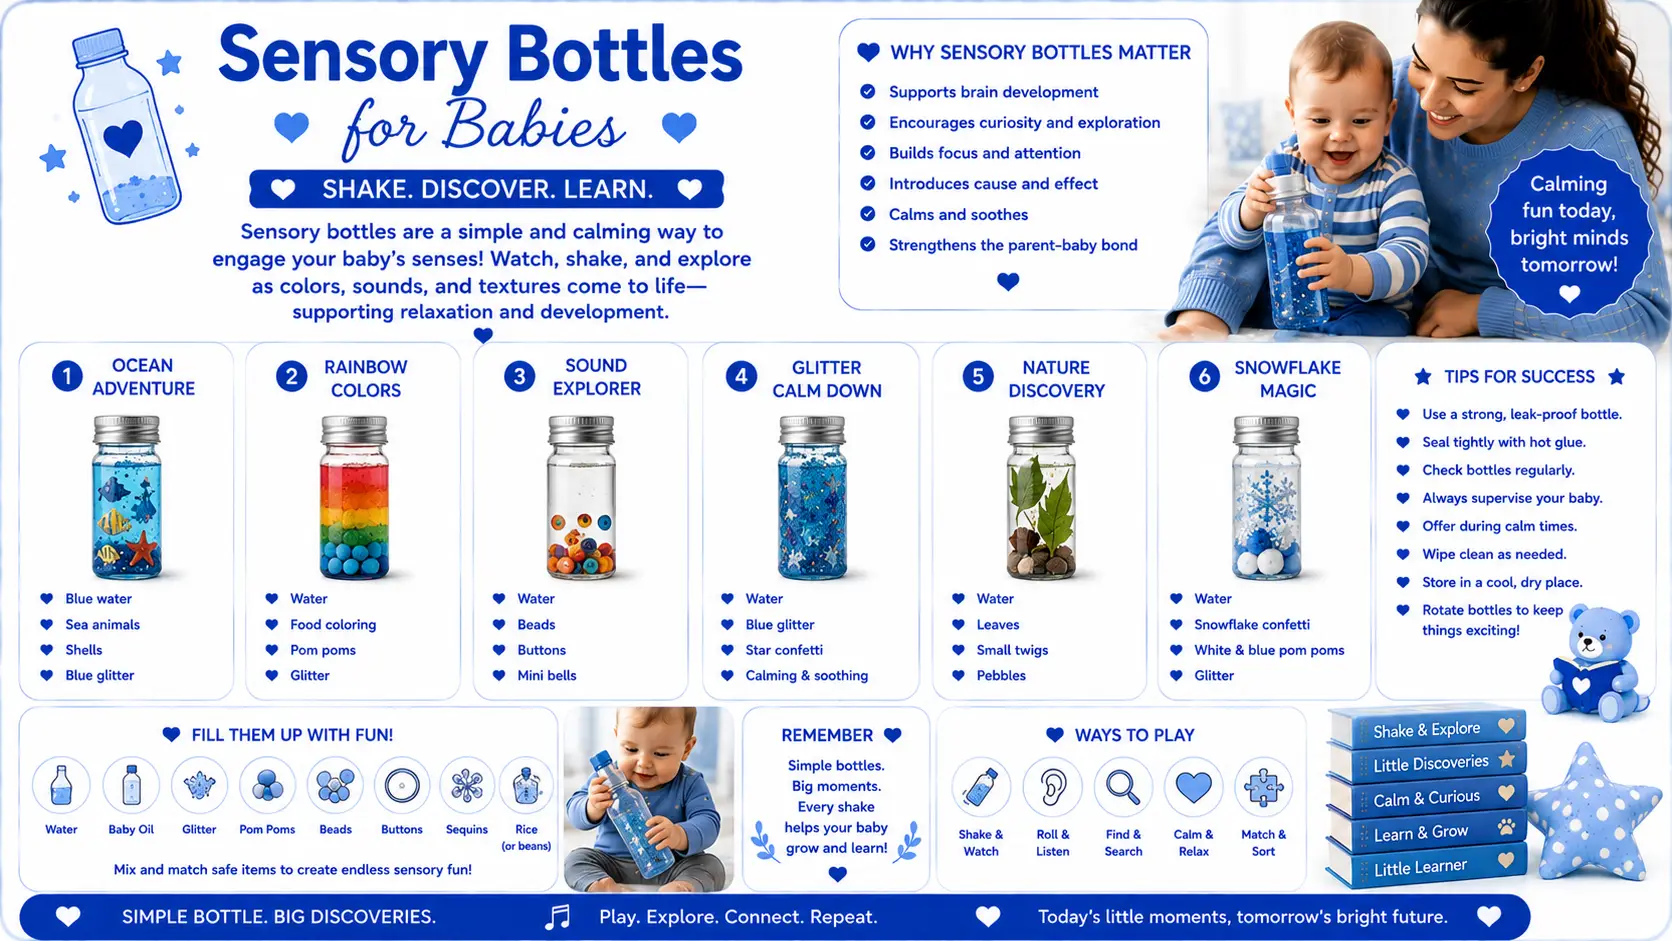

Sensory bottles for babies are simple, sealed clear containers filled with liquids, colors, or small objects that babies can watch, shake, and explore. They’re a mess-free form of sensory play that captures attention through movement, color, and sound while supporting early development.
Parents and caregivers often search for “DIY sensory bottles for babies,” “how to make sensory bottles for infants,” “are sensory bottles safe for babies,” and “benefits of sensory bottles for babies.” These bottles (sometimes called calm-down jars or discovery bottles) deliver visual tracking practice, gentle stimulation, and a soothing option during fussy moments—all without the cleanup of open sensory bins.
Benefits of Sensory Bottles for Babies
Sensory play helps build neural pathways as babies explore their world. Sensory bottles offer controlled input that supports several areas of growth.
They encourage visual tracking as babies follow glitter, beads, or floating items. High-contrast designs (black and white early on, then bold primary colors) match developing vision. Grasping and shaking the bottle builds fine motor skills and hand-eye coordination. The predictable, slow movement can help with emotional regulation—watching contents settle often calms an overstimulated or fussy baby, similar to how older children use calm-down bottles.
Many parents use them during tummy time or quiet play to extend attention spans in short bursts. They’re portable, durable, and ideal for car rides or waiting rooms. Research and early childhood guidance consistently note that safe sensory experiences support cognitive curiosity, sensory integration, and self-regulation from the earliest months.
Safety First: Are Sensory Bottles Safe for Babies?
Yes—when made and used correctly. Babies explore with their mouths, so safety is non-negotiable.
Use only sturdy, unbreakable plastic bottles (never glass). Clean and dry them thoroughly, remove labels, and permanently seal the lid with strong glue or a hot-glue gun so it cannot be opened. Check seals regularly, as heat and repeated handling can weaken them. Avoid small, loose parts that could become choking hazards if the bottle ever failed. Skip strong scents and very loud rattling fillers for the youngest babies. Always supervise; even a well-sealed bottle should not be left alone with a baby under 2.
Start around 3–4 months, once a baby can track movement with their eyes. Younger infants benefit most from high-contrast, slow-moving contents rather than busy, multi-colored glitter mixes that can overwhelm developing vision.
How to Make Sensory Bottles for Babies
Homemade versions are inexpensive and customizable. Basic materials include clean clear plastic bottles (small water or Voss-style bottles work well), warm water, clear glue/corn syrup/baby oil (to slow movement), food coloring, and simple fillers. A funnel helps. Super-glue the lid when finished.
Basic calm-down glitter bottle Fill about one-third with clear glue or corn syrup. Add warm water to three-quarters full, a few drops of food coloring, and a modest amount of fine glitter. Seal tightly. The glue slows the glitter’s fall for a calming visual.
Other easy DIY sensory bottle ideas for babies
High-contrast bottle: Water plus black-and-white shapes or stickers (safe for the youngest).
Oil-and-water bottle: Water with a drop of color, topped with baby oil for slow-separating waves.
Floating objects: Water with a few large, soft items like pom-poms or loom bands (keep quantities low and size large enough).
Foamy bottle: Water plus a little dish soap for bubbles that form and fade with shaking.
Nature-inspired: Water with a few clean, large leaves or petals (supervised and temporary).
For younger babies (3–6 months), keep it simple—one or two bold colors and slow movement. By 6–12 months you can introduce more color or gentle themes (ocean-style oil layers, for example). Avoid rice, pasta, or tiny beads until well past the intense mouthing stage.
Make several so you can rotate them. Store upright and inspect before each use.
Age-Appropriate Tips and How to Use Them
At 0–3 months focus on high-contrast black-and-white or very slow motion. By 3–6 months introduce one calm color and gentle floating items. From 6–12 months, oil-water mixes or slowed glitter work well. Demonstrate by slowly rolling or turning the bottle at eye level while narrating (“Look, it’s moving slowly”). Let the baby take over once interested. Sessions are often just a few minutes—follow the baby’s attention rather than forcing longer play. Use during calm moments, tummy time, or to help transition out of overstimulation. They are not sleep aids and should stay out of the crib.
FAQ
What age can babies start using sensory bottles?
Around 3–4 months is a common starting point, once visual tracking is emerging. High-contrast, simple bottles suit the youngest; more complex ones come later.
Are sensory bottles safe for babies under 1 year?
Yes, if the bottle is plastic, fully sealed with glue, free of small choking hazards, and always used with supervision. Check seals weekly.
How do I make a calm-down sensory bottle for my baby?
Combine water, a thickening agent (glue, corn syrup, or oil), food coloring, and limited glitter or large soft items. Seal permanently. Slow movement is key for calming.
What should I put inside sensory bottles for infants?
Keep fillers simple and large: water, a single color, slowed glitter, oil layers, or a few pom-poms/loom bands. Skip tiny beads, rice, pasta, and strong scents for babies.
Can sensory bottles help with fussiness or overstimulation?
Many parents find the gentle, predictable movement helps babies settle during fussy periods by giving focused visual input. They are a tool for short-term regulation, not a cure-all, and work best when paired with other calming routines.